Decorating and Recipes: The Chocolate Deck
Luscious fix of this ultimate indulgence" It time for something sweet
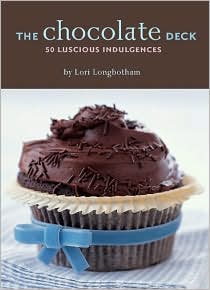
Those words are from the description of the latest must have find for all of you sweet lovers. Hearing that sort of language makes you want to head to your nearest baker immediately in search of a little something for your sweet tooth. Come on admit it. All the sugary treats you can probably stand are all included in a Nook Book called The Chocolate Deck. It contains about 50 recipes for the popular dark chocolate surprises that get you finger licking results at the dinner table and finger licking results leaving no crumbs behind for scrapping.
There is a lot to learn when you are thinking in terms of desserts, especially for do it yourself jobs. Earlier this month I cranked up the over, mixed up a couple of store bought boxed recipes, and whola, just like that the cakes were cooling. Then, I got to decorating. This post is so important not only because of the 50 recipes in The Chocolate Deck above, I want to drop some basic knowledge that will help you when you decide to do your baking at home. Before I go any further, I want to show you how the cake turned out. Here is the picture.

The fact that we were celebrating my sons 19th year made me want to try to wow him just because we had decided that this year we would skip the bakery cake purchase. Every so often we do because we like to put our own spin on the goodies we bake. It's true do it yourself decorating is not for the impatient but by using a few of the tricks that I will share further along in this post, the newbie home baker can get some really professional looking results. The tips given here will be less related to the baking process and more to do with preparation before decorating, decorating with store bought icing, and using whipped topping as a garnish. Getting your cake decked out will be easy if you pay close attention to the stability of the cake, the cool down process, and post icing stage.
Preparation & Cooling
- Remove the cake from the oven
- Place it on a chopping board in the freezer (15-20 min.)
- Put whipped topping in the freezer at this time
- After the cool down process is complete take the cake and whipped topping out
- Put the whipped topping in the refrigerator
The Icing Process *very important stage*
- Remove your cake from the pan
- Place it on the surface where it will remain after decorating is complete (best for novices)
- Start with two containers of store brought icing
- Use a Medium Sized Spoon for spreading
- Spread in the desired pattern covering the cake completely
- Get your whipped topping from the refrigerator and add it in the center
- Place your decorated cake in the freezer until the icing is semi hard
Now if you are new do baking, this may sound stage at first, but I promise you that the results will make you appreciate these tips. This is the most important part of the process, so please don't deviate. Once you remove your cake from the freezer this time, you can continue decorating. Apply etchings, garnishes, and any other designs you may like. Remember, this is the ideal stage for decorating your baked goods, so let your creativity guide you.
Following these instructions carefully will prevent you from having a cake with soft, gooey, icing, and your cake wont look like the work of a beginner. Believe me, this will open the door to many more simple beautiful do it yourself jobs that look like the baked goods you see in magazines. It's time for dessert. Start your cake today. Try it for yourself.
In : Desserts
Tags: abornewords abornewordsnkp nicolekphillips cakes bakery dessert bakedgoods
comments powered by Disqus